
How to Make Beats: The Complete Step-By-Step Beginner's Guide to Beat Making
Every day, millions of people hear a beat that stops them in their tracks.
Maybe it's the thunderous 808s in the latest Travis Scott track, or the intricate hi-hat patterns that make Metro Boomin beats instantly recognisable.
Whether it's a TikTok trend, Fred Again's Boiler Room set, liquid drum and bass or a LoFi study mix—that moment when you think "I need to learn how this was made" is where beat making journeys begin.
Here's what most tutorials won't tell you: the producers behind those chart-topping beats didn't start with expensive studios or formal music training.
They started exactly where you are right now—curious, motivated, and armed with nothing more than a basic computer and a burning desire to create.
The game has completely changed.
Bedroom producers secure major label placements through Instagram DMs. TikTok algorithms launch unknown beats into viral phenomena overnight.
The gatekeepers who once controlled access to professional studios? Replaced by download links and raw creativity.
This guide cuts through the information overload that paralyses beginners.
No overwhelming technique dumps. No endless theory rabbit holes.
Just the essential knowledge that gets you from zero to your first complete beat.
You'll discover what equipment actually matters, master a proven step-by-step process, and sidestep the common traps that keep most people stuck in tutorial loops—never finishing anything.
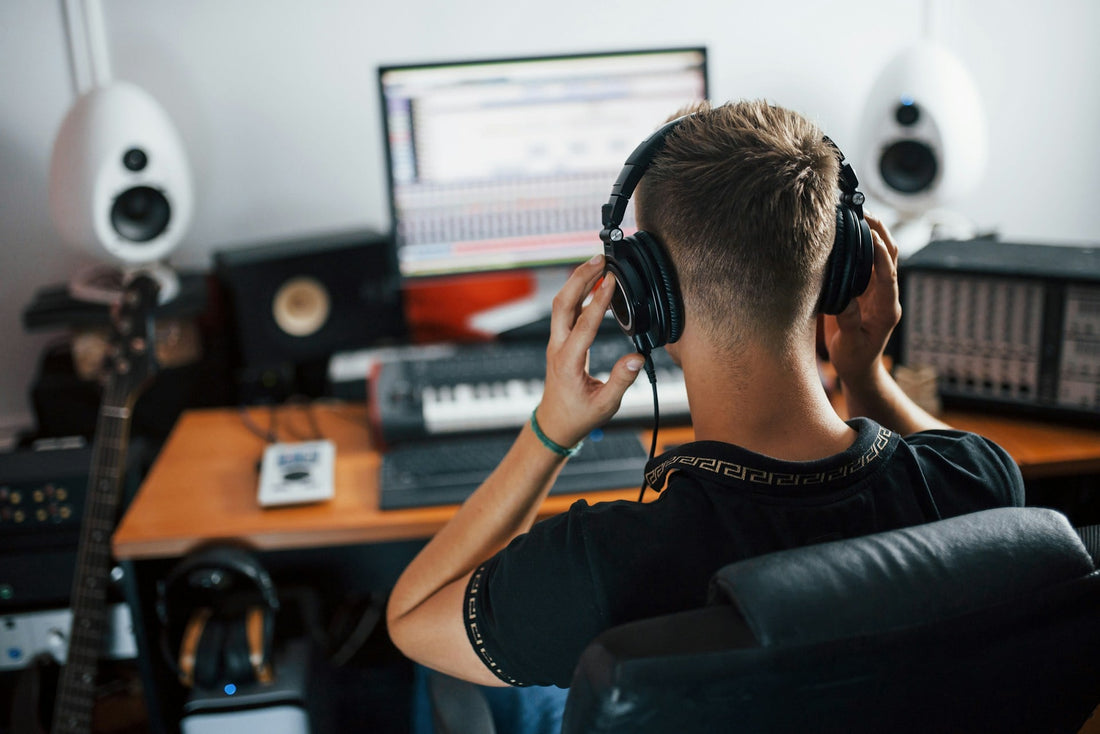
What equipment do you actually need to make beats?

Forget what you've seen in music videos. Those wall-to-wall synthesisers and mixing boards look impressive (and they absolutely are if you’re a world-class producer), but they're not what created the beats you love.
Most modern beat making happens entirely inside your computer or laptop, using software that costs less than a single hardware synthesiser from the 1990s.
Most commonly, everything you need can be found inside a Digital Audio Workstation, or DAW. Everything an entire recording studio has to offer in the palm of your hand. Some popular ones include:
FL Studio ($99-$899) earned its reputation as the hip-hop industry standard through producers like Southside, TM88, and countless others who shaped the sound of modern rap. Its lifetime free updates policy means you invest once and receive every future improvement.
The step sequencer makes drum programming feel like playing an instrument rather than programming a spreadsheet.
This is probably the go-to for most beginners. There’s a ton of functionality, more plugins than you’ll ever need, and a thriving community of producers to help, get inspired by, and to share your creations.
Ableton Live ($99-$749) took a different approach, designing specifically for electronic music creation and live performance. Its Session View lets you trigger loops and build tracks in real-time, perfect for discovering unexpected combinations.
The included Max for Live integration opens unlimited sound design possibilities that would have required expensive hardware just years ago.
Logic Pro ($199, Mac only) delivers professional capabilities at an almost ridiculous price point. The included sound library contains orchestral instruments, vintage synths, and drum samples that rival collections costing thousands separately.
Apple's integration means it runs efficiently on any Mac, from MacBook Air to Mac Pro.
Free options eliminate the excuse of "I can't afford to start."
GarageBand ships with every Mac and includes legitimate professional tools that have appeared on Billboard hits. Cakewalk by BandLab provides full-featured production on Windows completely free.
These aren't demo versions or limited trials—they're complete production environments.
MIDI controllers bridge the gap between musical ideas and computer input.
While not essential, but definitely helps when it comes to creating quality music, the Akai MPK Mini MK3 ($119) packs 25 keys and 8 velocity-sensitive pads into a compact package that fits any workspace.
Its tactile response transforms programming from data entry into musical performance.
The muscle memory you develop, translating rhythmic ideas through physical pads, becomes invaluable as your skills advance.
It’s the kind of device you see Fred Again using.
Audio interfaces upgrade your sound quality beyond internal computer audio. The Focusrite Scarlett Solo ($120) provides professional-grade digital conversion for both recording and playback.
You'll immediately notice details in your beats that computer speakers masked, while the low-latency monitoring lets you layer ideas without distracting delays.
Proper monitoring reveals mixed problems before they become permanent mistakes. Audio-Technica ATH-M50x headphones ($149) deliver a flat response that translates accurately across different playback systems.
When you're ready for speakers, KRK Rokit 5 monitors ($298/pair) provide the extended bass response essential for modern beat making.
Your budget determines your timeline, not your ceiling. Start with what you can afford today—even free software on your existing computer—then upgrade incrementally as your skills and income grow.
The most important investment is time spent learning and creating, not money spent on equipment that sits unused.
How to make your first beat in 6 simple steps

Creating beats becomes manageable when you break the process into distinct phases.
This systematic approach prevents the overwhelm that kills creativity before it starts, while building skills that compound with each completed beat.
Master this and make it work, get the foundations down, then you can go ahead and start breaking it up and making it your own.
Step 1: Choose your tempo and style
Tempo selection determines your beat's DNA before you place a single sound. Get this wrong, and your track will feel off no matter how perfect everything else sounds.
Here's your genre-specific BPM roadmap:
Hip-Hop & Rap:
- Classic Hip-Hop: 85-95 BPM (perfect for complex wordplay and head-nodding grooves)
- Modern Trap: 140-150 BPM (feels slower due to half-time drum patterns)
- Boom Bap: 90-100 BPM (that old-school New York vibe)
Electronic & Dance:
- House: 120-128 BPM (dancefloor domination)
- Techno: 120-135 BPM (relentless energy)
- Drum & Bass: 160-180 BPM (pure adrenaline)
- Dubstep: 140 BPM (half-time drops create the wobble)
- Hardtek: 150-200 BPM (industrial mayhem)
Alternative & Experimental:
- LoFi Hip-Hop: 70-90 BPM (chill study vibes)
- UK Drill: 140-150 BPM (aggressive, syncopated patterns)
- Phonk: 120-140 BPM (Memphis rap meets modern production)
- Breakcore: 150-300+ BPM (chaotic, sample-heavy madness)
The secret? Modern trap uses the same 140 BPM as dubstep but creates completely different energy through rhythm patterns and sound design. Tempo sets the foundation—your drum programming creates the feel.
Pro tip: Load a reference track into your DAW and use tap tempo to match its BPM. You're not copying—you're learning the mathematical foundations that make genres instantly recognisable.
Step 2: Create your drum pattern
Drums establish your beat's rhythmic personality and should always come first in your creative process. The fundamental "boom-bap" pattern—kicks on 1 and 3, snares on 2 and 4—provides the backbone for everything from classic hip-hop to modern pop.
Master this foundation before attempting complex variations.
Sample layering creates professional drum impact without requiring premium sounds.
Combine kick samples strategically: one for sub-bass presence below 80Hz, another for mid range punch around 200Hz, possibly a third for high-frequency click around 2-5kHz.
This technique builds power through frequency stacking rather than simple volume increases.
Hi-hat programming separates amateur beats from professional productions.
Start with steady 8th note patterns to establish consistent rhythm, then experiment with 16th note variations for increased energy.
Trap production revolutionised hi-hat use through rapid 32nd note rolls that create nervous tension. Velocity variation humanises programmed patterns—alternate between strong and weak hits to simulate natural playing dynamics.
Use your DAW's programming tools effectively.
Step sequencers excel for repetitive patterns and quick experimentation. Piano rolls offer precise timing control for complex rhythms and swing adjustments. Most professional producers combine both approaches depending on the specific pattern they're creating.
Step 3: Build your bassline
Basslines provide a harmonic foundation while locking rhythmically with drums. Begin with root note patterns that outline your chord progression—if chords move C-Am-F-G, the bass follows with C-A-F-G on strong beats.
This approach creates harmonic clarity without complexity that might interfere with vocal melodies later.
Modern 808-style production blurs the line between percussion and bass. These tuned kick drums serve dual roles, providing both rhythmic impact and harmonic foundation.
Tune your 808s to specific pitches rather than leaving them at random frequencies. When your chord progression hits C major, tune your 808 to C for a harmonic connection that listeners feel subconsciously.
Kick and bass relationships determine low-end character.
When both elements hit simultaneously, their frequencies combine for maximum impact—perfect for drop moments or chorus sections.
When they alternate, each gets clean frequency space—ideal for intricate patterns or busy arrangements. Experiment with both approaches within a single beat.
Simple bass lines often outperform complex ones.
Two-note patterns between the root and fifth create movement without overwhelming the arrangement.
As your skills develop, add passing notes and rhythmic variations, but remember that memorable bass lines usually feature strong, simple foundations enhanced by subtle complexity.
Step 4: Add melody and harmony
Melodic elements make beats memorable, but restraint prevents arrangement overcrowding. Two-to-four note phrases, repeated and varied, work more effectively than constant complex runs.
Consider that vocal melodies will eventually occupy much of this frequency range—your instrumental melodies should support and complement rather than compete.
Scale knowledge eliminates harmonic guesswork.
Major pentatonic scales (1-2-3-5-6) naturally create uplifting, commercial-friendly melodies. Minor pentatonic scales (1-3-4-5-7) evoke moodier emotions, perfect for introspective or aggressive content.
Pentatonic scales contain no "avoid notes," making them virtually foolproof for beginners.
Instrument layering adds richness without creating chaos. Start with one primary melodic element—piano, synth lead, or sampled instrument. Add supporting layers at different octaves: warm strings underneath, bright bells or plucks on top.
Each element requires its own frequency territory to avoid masking effects that muddy the overall sound.
Strategic silence creates an impact that constant activity cannot achieve. Professional arrangements breathe through carefully placed gaps that let individual elements shine while building anticipation for fuller sections.
Empty space in your beats isn't a problem to solve—it's a tool to use intentionally.
Step 5: Create song structure
Song arrangement transforms loops into complete musical experiences.
Standard structures exist because they work: intro (8 bars), verse (16 bars), chorus (8 bars), verse (16 bars), chorus (8 bars), outro (8 bars).
This framework provides familiar navigation for listeners while giving you creative boundaries to work within.
Verse sections require careful subtraction to create space for vocal content. Remove melodic layers, simplify drum patterns, or thin the overall arrangement while maintaining the core groove.
Verses should feel related to your main loop but provide a clear contrast to the fuller chorus sections that follow.
Chorus sections add energy through strategic element introduction.
Bring back removed instruments, layer additional percussion, introduce new melodic components, or apply effects automation.
The emotional impact comes from contrast—the bigger the difference between verse and chorus, the more powerful the transition feels.
Visual arrangement in your DAW helps you see the song's energy flow while maintaining structural consistency. Copy your basic loop across the timeline, then modify each section by adding or removing elements.
This approach ensures your beat maintains its core identity while providing the variation necessary for sustained interest.
Step 6: Add finishing touches
Transitional elements guide listeners smoothly between song sections.
Simple drum fills, rising filter sweeps, or impact sounds create natural bridges from verse to chorus. Most sample libraries include transition effects specifically designed for this purpose—experiment with different options to develop your signature style.
Effects processing adds dimension and movement without cluttering your mix. Reverb creates spatial depth and atmosphere. Delay adds rhythmic echoes that enhance groove. Filter automation creates movement through frequency sweeps.
Start with subtle applications—effects should enhance existing elements rather than become the focus themselves.
Basic mixing principles ensure clarity and impact. Balance track levels so every element remains audible in the full arrangement.
Use EQ to assign each sound its own frequency territory—high-pass instruments that don't require bass content, boost presence frequencies for clarity, and cut problematic frequencies that create muddiness or harshness.
Completion beats perfection every time.
Your first beats won't match commercial productions, and that expectation only creates paralysing perfectionism. Focus on experiencing the entire creative process from conception to completion.
The lessons learned from finishing imperfect beats advance your skills more than endless tweaking of incomplete ideas.
The only music theory you need to know (right now)

Music theory serves beat makers best when it explains what sounds good rather than dictating what you should play. While important, there are a ton of people who get lost in YouTube rabbit holes, watching every video under the sun titled “THIS THEORY TIP WILL CHANGE THE WAY YOU…”
Yeah, no magic tip will drastically move the needle when it comes to production quality and outcome. It’s all about continuously and consistently learning through experience, so keep going.
However, understanding basic concepts accelerates your workflow and helps you communicate with other musicians, but creativity always trumps academic correctness.
Keys and scales organise notes into harmonious families.
Major scales create bright, optimistic feelings that work perfectly for commercial appeal and uplifting content. The C major scale uses only white keys (C-D-E-F-G-A-B), making it an ideal starting point for experimentation.
Minor scales evoke darker, more introspective emotions, perfect for moody or aggressive beats. A minor also uses white keys, starting from A.
Pentatonic scales remove harmonic risk by eliminating notes that might clash.
Major pentatonic creates instantly recognisable melodies found in everything from pop anthems to country classics. Minor pentatonic dominates blues, rock, and hip-hop with its inherent emotional weight.
These five-note scales make it nearly impossible to play wrong notes, building confidence while you develop your ear.
Chord progressions create emotional movement that transforms static loops into dynamic musical journeys. The ubiquitous vi-IV-I-V progression appears across all genres because it creates natural tension and resolution. In C major, this becomes Am-F-C-G—a sequence your ear recognises from countless hit songs.
Apply theory practically in your beat-making process.
Basslines should emphasise root notes (the first note of each chord) for harmonic stability, with occasional movement to the fifth for variety. Melodies built from your chosen scale will harmonise naturally with your chord progression.
Even drum tuning benefits from harmonic awareness—kicks tuned to your song's root note create subtle harmonic reinforcement that adds professional polish.
Master one key thoroughly before exploring others.
C major and its relative minor (A minor) provide excellent starting points since they avoid sharps and flats. Once you understand how these keys function, other keys follow the same patterns with different starting notes.
Depth in a few keys serves you better than surface knowledge across many.
5 beat-making mistakes that kill your sound

You’re going to make mistakes, and that’s a good thing. Don’t let them put you off because you feel as though you’re a failure, and music production or beat making isn’t for you.
A mistake is simply highlighting which lessons you need to learn.
That said, learning the common errors accelerates your progress by helping you avoid pitfalls that trap most beginners.
These solutions come from analysing hundreds of amateur productions and identifying patterns that consistently separate bedroom beats from professional releases.
Muddy low-end destroys the power that should define your beat's foundation.
This happens when kick drums and basslines fight for the same frequency territory around 60-80Hz, creating unclear, weak low-end instead of a punchy foundation.
Solve this through strategic EQ carving—cut bass frequencies where your kick hits hardest, while boosting bass slightly above or below the kick's primary frequency. Sidechain compression automates this process by ducking bass whenever kicks trigger.
Lifeless drums signal amateur production instantly.
This isn't about volume—it's about impact and character. Layer kick samples strategically: sub-bass for weight, midrange for punch, high-frequency for click. Apply compression to enhance attack transients without destroying dynamics.
Parallel compression adds power while maintaining a natural feel—duplicate your drum bus, compress heavily, then blend with the original signal.
Overcrowded arrangements suffocate individual elements.
Individual elements that should breathe and shine independently. Professional beats achieve impact through strategic subtraction rather than constant addition.
Use arrangement techniques—removing elements between sections, high-pass filtering non-essential sounds, and resisting the urge to fill every frequency gap.
Negative space creates an impact that busy arrangements cannot achieve.
Endless loop tweaking prevents beat completion.
And the trap of always trying to find the next-best tip to develop your skills that actually stops you from finishing projects.
Set strict time limits for each creative session—if you can't improve something within 30 minutes, either version probably works fine. Force yourself to arrange loops into complete songs even when they feel imperfect.
The experience gained from completing beats teaches more than endless perfectionism applied to fragments.
Structural ignorance creates extended loops instead of actual songs.
Real beats have verses, choruses, and bridges that create emotional journeys for listeners. Study your favourite tracks' arrangements carefully, noting exactly when elements enter and exit.
Create dynamic contrast between sections through intelligent addition and subtraction rather than maintaining constant complexity throughout.
How to take your beat-making to the next level
With everything you’ve learned above, you should have pretty much everything you need to make some pretty decent beats. Especially if you commit to structured practice and creative exploration.
That said, it’s worth knowing and looking out for what the next steps are. Once you really start work like this, you’ll see how quickly your skills start to develop, so you’ll be wanting to know these pretty quickly.
Here are some ideas to consider.
Consistent daily practice outperforms sporadic intensive sessions for building lasting skills. Commit to 30-45 minutes daily rather than weekend marathons that lead to burnout. Regular short sessions develop muscle memory, train your ear, and build creative instincts more effectively than irregular intensive periods. Document your progress to maintain motivation and identify improvement areas.
Active listening to reference tracks teaches arrangement, sound selection, and production techniques more effectively than passive consumption. Load favourite beats into your DAW and analyse their construction. Notice element entry points, frequency balance, and rhythmic relationships. Recreation exercises—attempting to match professional results—reveal techniques impossible to discover through tutorials alone.
Community engagement accelerates learning through feedback, collaboration, and shared knowledge.
Join Reddit's r/makinghiphop, Discord servers, and local producer meetups. Share work regularly for constructive criticism. Collaborate with other producers and artists to learn different approaches.
Teaching others reinforces your own knowledge while building valuable relationships.
Signature sound development happens through repeated choices rather than constant technique switching. Identify processing chains, scales, and rhythmic patterns you gravitate toward naturally.
Develop these preferences consciously while gradually expanding your toolkit. Your creative limitations often become your greatest strengths when fully explored.
Regular sharing builds an audience and provides motivation for continued improvement. Post beat snippets on social media with behind-the-scenes content showing your creative process.
Consistency matters more than perfection—followers connect with authentic growth journeys as much as polished final products.
Document your evolution to inspire others beginning their own beat-making adventures.
Conclusion
The gap between dreaming about making beats and actually creating them closes the moment you open a DAW and place your first sound. Every professional producer started exactly where you are—curious, uncertain, but willing to experiment and learn through direct experience.
Begin immediately with available resources.
Download free software, explore built-in sounds, and follow along with YouTube tutorials. Your first beats won't sound professional, and that's perfectly normal.
Focus on completing the entire process from start to finish rather than achieving perfection in individual elements.
Set realistic expectations that encourage continued progress.
Your musical heroes developed their skills over thousands of hours spanning multiple years. Measure your progress against your previous work rather than commercial releases.
Celebrate small victories—your first completed beat, first interesting drum pattern, first melody that gives you chills.
But here's what separates bedroom producers from professionals: the ability to hear your beats accurately while you create them.
Most beginners struggle with mixes that sound amazing on headphones but terrible everywhere else.
The culprit?
Untreated room acoustics that lie to your ears. Those reflections bouncing off your walls are sabotaging every EQ decision, every level adjustment, every creative choice you make.
This is where your space becomes as important as your skills. AudioSilk acoustic panels eliminate the guesswork by controlling problematic reflections and creating the accurate monitoring environment you need.
No more second-guessing your balance. No more beats that sound muddy on car speakers. Just clear, honest sound that translates everywhere.
The tools, techniques, and knowledge needed for professional beat making are more accessible than ever. Your unique perspective matters more than your budget or technical skill level. But make sure you can actually hear what you're creating.
Ready to transform your beat-making setup?
Get AudioSilk panels and start hearing your beats the way they really sound, not the way your room wants them to sound.
Use code BLOG10 for 10% off your first order →


