
EQ Meaning: The Complete Guide to Audio Equalisation for Home Studio Creators
You've spent hours perfecting that vocal take. The melody is spot-on, the performance has emotion, and the recording quality sounds clean through your headphones.
But when you play it back through your monitors, something's wrong.
The voice sounds muddy, lost behind the instruments, or weirdly thin. Meanwhile, that reference track you love sounds crystal clear and professional on the same speakers.
This is a frustrating and usually unforeseen truth when it comes to starting your career as a musician and making your own music. Great recordings often sound amateur without the professional touch, usually in the form of proper EQ.
However, take time to understand EQ and how to apply it, and you can turn your home studio productions from "bedroom demo" to "radio-ready."
Whether you're a producer crafting beats, a podcaster seeking clarity, or a singer recording vocals, EQ is the fundamental tool that separates professional sound from amateur recordings.
Here’s everything you need to know.
What does EQ actually mean?
EQ stands for equalisation, and refers to the process of adjusting the levels of the different frequencies in your track individually, so they sound better together.
Imagine it as frequency-specific volume controls.
While your master volume knob affects all frequencies equally (making everything louder or quieter), EQ lets you turn up or down specific frequency ranges independently.
These frequencies include bass, midrange, and treble. That's essentially what EQ provides, except with much more precision and control.
The concept originated from telephone systems in the early 1900s. Engineers needed to "equalise" signal loss over long-distance calls, boosting frequencies that cables naturally attenuated.
Modern audio EQ evolved from this same principle: adjusting specific frequencies to achieve the desired tonal balance.
EQ vs. simple volume control:
- Volume affects all frequencies from 20Hz to 20kHz equally
- EQ targets specific frequency ranges independently
- You can boost the bass while cutting harsh midrange frequencies
- This selective control is what makes professional mixing possible
For home studio creators, EQ serves three critical functions: fixing potential problems in your recordings, enhancing the natural characteristics of instruments and voices, and creating space in dense mixes so every element can be heard clearly.
A way of highlighting the part of your track that you want heard, like amplifying a subject in a photo.
Understanding this foundation changes everything about how you approach your recordings.
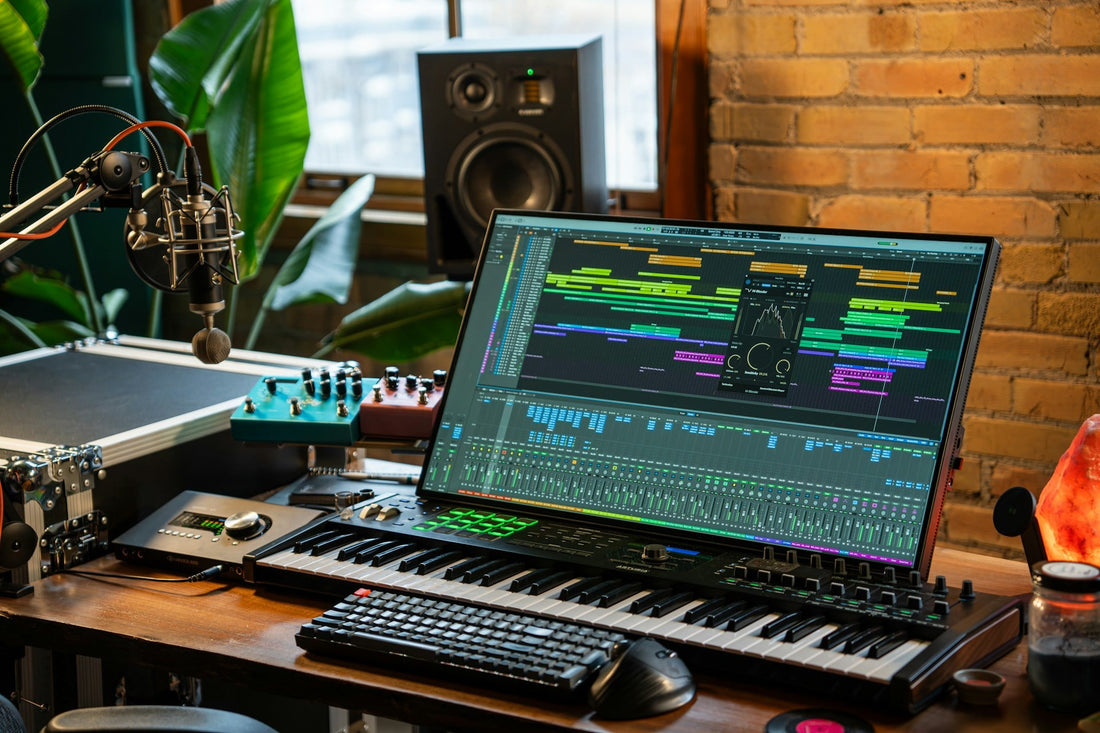
How EQ works: The frequency spectrum explained
The audible frequency spectrum spans from 20Hz to 20,000Hz (20kHz), and each range contributes distinct characteristics to your recordings. Professional mixing requires understanding what lives where.
- Sub-bass (20-60Hz): These frequencies are felt more than heard. Electronic music pushes sub-bass for dancefloor impact, but some home studio recordings benefit from filtering out this range. In some cases, it can clutter your mix without adding musical content.
- Bass (60-250Hz): This is where warmth and fullness live. Kick drums punch around 60-80Hz, while bass guitars occupy 80-120Hz. But here's the catch: too much energy in this range creates the dreaded "muddy" sound that plagues home recordings.
- Low-mids (250-500 Hz): The body and thickness of instruments live here, but it's also one of the most problematic ranges for home studios. Excessive energy around 300-400 Hz makes everything sound boxy and unclear. Selective cuts in this range can often be vital.
- Mid-range (500Hz-2kHz): This is where the magic happens. Most instruments and vocals have their core content here, and human hearing is most sensitive to these frequencies. Vocals need presence around 1-2kHz to cut through dense mixes.
- High-mids (2-5kHz): Vocal intelligibility and instrument presence live in this range. Boosting around 3kHz makes vocals jump forward in the mix, but too much creates listener fatigue. This is where sibilance (harsh "s" sounds) becomes problematic.
- Highs (5-20kHz): Air, sparkle, and that "expensive" sound happen here. A gentle boost around 10-12kHz adds openness to vocals and acoustic instruments. But be careful—harsh frequencies around 6-8kHz cause ear fatigue quickly.
Every EQ provides three essential controls. Frequency determines which frequencies you're adjusting. Gain controls how much you boost or cut, measured in decibels (dB). Q or bandwidth determines how wide or narrow your adjustment affects neighbouring frequencies.
High Q values create surgical precision, while low Q values provide broader, more musical adjustments.
What are the types of EQ, and when to use each?
Different EQ types serve distinct purposes, and choosing the right tool dramatically affects your results.
- Parametric EQ offers complete control over frequency, gain, and Q factor, making it the Swiss Army knife of equalisation. Popular options like FabFilter Pro-Q or your DAW's stock EQ provide multiple bands of parametric control. Use parametric EQ for most mixing situations—it handles everything from surgical problem-solving to creative tone shaping.
- Graphic EQ features fixed frequency bands with individual sliders, providing immediate visual feedback of your EQ curve. While less flexible than parametric designs, graphic EQs excel when you need quick, broad adjustments. The visual representation helps when teaching EQ concepts or making live sound adjustments.
- Shelving EQ affects all frequencies above (high shelf) or below (low shelf) a specified point, creating broad tonal adjustments that sound natural and musical. A high shelf boost adds "air" and brightness to vocals, while a low shelf can add warmth or remove muddiness from the entire mix. Use shelving EQ for overall tonal balance and mastering applications.
- High-pass and low-pass filters remove frequencies entirely rather than just reducing them. The high-pass filter (also called low-cut) might be one of the most important EQ tools in your arsenal. Setting it around 80-100Hz on non-bass instruments can remove unnecessary low-frequency content that clutters your mix without affecting the musical content.
Most professional mixing combines multiple EQ types. A typical vocal chain might use a high-pass filter to remove rumble, parametric bands to fix specific problems and enhance presence, and a gentle high shelf to add sparkle.
What are the practical EQ applications for different content types?
Understanding how to apply EQ effectively depends on your content type and goals. Every piece of recorded audio is different, but there are some useful 'rules of thumb' that you can try on different sounds.
Music production
For vocals, start with a high-pass filter around 80-120Hz to remove handling noise and rumble. The 200-400 Hz range often contains muddiness that clouds vocal clarity—a gentle 3dB cut around 300 Hz could clean up the sound.
Boost 2-4kHz for presence and intelligibility, then add a subtle high shelf around 10kHz for air and sparkle.
Drums require frequency-specific approaches. Kick drums gain punch from boosts around 60-80 Hz for impact and 2-4kHz for beater attack. Remove muddy frequencies around 300 Hz that obscure the definition.
Snare drums often need a body around 200 Hz and a crack around 2-3kHz.
Electric guitars can benefit from high-pass filtering around 100Hz and careful cuts in the 400Hz-1kHz range where harsh, "honky" characteristics live. Lead guitars often need presence boosts around 3kHz, while rhythm guitars might need cuts here to leave space for vocals.
Podcast production
Voice clarity is everything in podcasting. A high-pass filter at 80-100 Hz removes handling noise and rumble. Reduce muddiness around 300 Hz for clarity, then enhance speech intelligibility with gentle boosts around 2-4kHz.
Control sibilance with careful cuts around 6-8kHz if needed.
YouTube and content creation
Consider that most viewers use phone speakers or earbuds with limited bass response. Focus your EQ work on 300 Hz-5kHz for maximum compatibility. Reduce the low-end to save bandwidth while enhancing vocal presence for dialogue clarity.
General home recording tips
Always start with corrective EQ—fix problems before enhancing good qualities. Make subtle adjustments, typically 3-6dB maximum.
Trust your ears over visual feedback, but use spectrum analysers to confirm what you hear. Most importantly, make decisions in the context of your full mix, not isolated tracks.
Common EQ mistakes to avoid

Every home studio creator falls into these traps. Recognising them early saves years of frustration.
The "Smiley Face" EQ curve
Boosting bass and treble while cutting mids represents the most damaging myth in home recording. This approach creates hollow, artificial sound by removing the very frequencies where most musical information lives.
Professional mixes maintain a strong midrange presence because that's where instruments naturally exist.
Over-EQing
Happens when you make extreme adjustments (beyond 6dB) or use too many narrow cuts. If you need dramatic EQ to make something sound good, the problem likely exists in the recording itself. Good recordings need subtle EQ enhancement, not radical surgery.
EQing in isolation
Leads to decisions that don't work in the full mix context. That vocal EQ that sounds perfect solo might completely disappear when the full arrangement plays. Always make final EQ decisions with the complete mix playing.
Ignoring room acoustics
Creates the biggest problems for home studio creators. You cannot EQ your way out of a bad room. If your monitoring environment has severe acoustic problems, every EQ decision becomes skewed. Even basic acoustic treatment—absorption panels at first reflection points—dramatically improves your ability to make accurate EQ choices.
The relationship between EQ and room acoustics
Here's the harsh truth: you cannot EQ your way out of a bad room.
Your room's acoustics fundamentally shape what you hear, which corrupts every EQ decision you make. Standing waves create brutal peaks and nulls, flutter echo adds metallic ringing, and poor acoustics skew your frequency response by up to 15dB.
EQ fixes frequency content, not acoustic problems.
You can't EQ away timing issues, phase cancellation, or excessive reverb. While you might tame some peaks, you can't fill the nulls where frequencies disappear completely.
This is where acoustic treatment becomes non-negotiable.
Transform your EQ accuracy in one afternoon. Even basic improvements—AudioSilk panels at first reflection points —revolutionise your ability to make precise EQ decisions. Professional studios maintain ±3dB frequency response. Untreated rooms? Often ±15dB chaos.
Every panel you install saves hours of compensatory EQ work and improves every mix you create. Treat the room first, then trust your ears.
The result? EQ decisions that actually translate to other systems, because you're finally hearing what's really there.
Making EQ work for you
EQ isn't just technical jargon—it's your secret weapon for transforming amateur recordings into professional-sounding tracks that compete with the big studios.
Master these fundamentals first: High-pass everything that doesn't need bass. Cut before you boost. Keep it subtle and musical. Different content demands different approaches—podcast vocals need clarity, electronic basslines need power.
But here's the thing: EQ enhances what's already captured. It can't create missing frequencies or fix poor performances. The best EQ work is invisible—it serves the music, not your ego.
Most importantly? Even perfect EQ skills can't overcome a bad room. Those frequency peaks and nulls in your untreated space are sabotaging every adjustment you make.
Get your acoustics right first, then trust your EQ decisions to translate everywhere.
Ready to hear what your mixes really sound like?
AudioSilk acoustic panels eliminate the guesswork, giving you the accurate monitoring environment you need for confident EQ decisions.
Transform your room this weekend and start making EQ choices that actually work.
Get 10% off AudioSilk panels here (using code BLOG10 at checkout)


